Rogue Job Change Guide: Difference between revisions
Superadmin (talk | contribs) Initial import from iRO Wiki Classic |
Superadmin (talk | contribs) Fatesend agent rewrite |
||
| Line 69: | Line 69: | ||
| Set 1 || 10,000 [[Zeny]], 5 {{item |id=507 Red Herb}}, 5 {{item |id=914 Fluff}}, 5 {{item |id=705 Clover}}, 5 {{item |id=1002 Iron Ore}}, 5 {{item |id=703 Empty Bottle}}, 5 {{item |id=915 Chrysalis}}, 5 {{item |id=908 Spawn}}, 5 {{item |id=918 Tooth of Bat}}, 5 {{item |id=916 Feather of Birds}}, 5 {{item |id=917 Talon}}, 5 {{item |id=528 Monster Feed}}, 5 {{item |id=919 Animal Skin}}, 5 {{item |id=953 Stone Heart}}, 5 {{item |id=904 Scorpion Tail}}, 5 {{item |id=942 Yoyo Tail}}, 5 {{item |id=715 Yellow Gemstone}}, 5 {{item |id=945 Racoon Leaf}} | | Set 1 || 10,000 [[Zeny]], 5 {{item |id=507 Red Herb}}, 5 {{item |id=914 Fluff}}, 5 {{item |id=705 Clover}}, 5 {{item |id=1002 Iron Ore}}, 5 {{item |id=703 Empty Bottle}}, 5 {{item |id=915 Chrysalis}}, 5 {{item |id=908 Spawn}}, 5 {{item |id=918 Tooth of Bat}}, 5 {{item |id=916 Feather of Birds}}, 5 {{item |id=917 Talon}}, 5 {{item |id=528 Monster Feed}}, 5 {{item |id=919 Animal Skin}}, 5 {{item |id=953 Stone Heart}}, 5 {{item |id=904 Scorpion Tail}}, 5 {{item |id=942 Yoyo Tail}}, 5 {{item |id=715 Yellow Gemstone}}, 5 {{item |id=945 Racoon Leaf}} | ||
|- | |- | ||
| Set 2 || | | Set 2 || 10 {{item |id=510 Blue Herb}}, 10 {{item |id=932 Skel-Bone}}, 10 {{item |id=957 Decayed Nail}}, 10 {{item |id=958 Horrendous Mouth}} | ||
|- | |- | ||
| Set 3 || | | Set 3 || 10 {{item |id=511 Green Herb}}, 10 {{item |id=964 Crab Shell}}, 10 {{item |id=926 Snake Scale}}, 10 {{item |id=910 Garlet}} | ||
|- | |- | ||
| Set 4 || 10,000 Zeny, | | Set 4 || 10 {{item |id=508 Yellow Herb}}, 10 {{item |id=935 Shell}}, 10 {{item |id=940 Grasshopper's Leg}}, 10 {{item |id=948 Bear's Footskin}} | ||
|- | |||
| Set 5 || 10,000 Zeny, 5 {{item |id=915 Chrysalis}}, 5 {{item |id=703 Empty Bottle}}, 5 {{item |id=1002 Iron Ore}}, 5 {{item |id=953 Stone Heart}}, 5 {{item |id=507 Red Herb}}, 5 {{item |id=919 Animal Skin}}, 5 {{item |id=715 Yellow Gemstone}}, 5 {{item |id=918 Tooth of Bat}}, 5 {{item |id=904 Scorpion Tail}}, 5 {{item |id=942 Yoyo Tail}}, 5 {{item |id=528 Monster Feed}}, 5 {{item |id=914 Fluff}}, 5 {{item |id=705 Clover}}, 5 {{item |id=916 Feather of Birds}}, 5 {{item |id=917 Talon}}, 5 {{item |id=908 Spawn}}, 5 {{item |id=945 Racoon Leaf}} | |||
|} | |} | ||
Revision as of 09:10, 12 December 2025
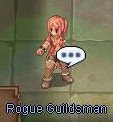
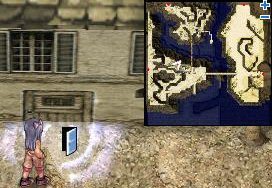
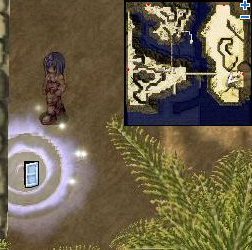
1. Go to the Pharos Lighthouse (cmd_fild07). To get there, go to Comodo or Morroc and speak to the Kafra for a warp. 2. You will need to take the portal in the lighthouse (cmd_fild07 193,117) downstairs and speak with the Rogue Guildsman (in_rogue 363, 122). 3. Markie will ask you one of the following sets of questions (answers given in bold). You must get at least 9 out of 10 questions correct to pass the test. Set 1
Set 2
Set 3
4. Once you have passed the written test, you will be sent to Mr. Smith (in_rogue 376, 23) on the floor above. He will tell you to go collect items. There are a few different sets of items. Listed Below.
5. After bringing back the correct items, Mr. Smith will send you to look for his partners. He will give you a password in his clue. Make sure you write this password down.
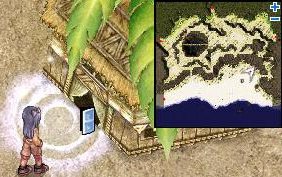
Aragham Jr. Fortress Saint Darmain (South) (cmd_fild09): 106, 195 Password: Aragham never hoarded upgrade items. Hollgrehenn Jr. Fortress Saint Darmain (South) (cmd_fild09): 335, 143 Password: My father never hoarded upgrade items. Antonio Jr. Kokomo Beach (cmd_fild04): 302,177 Password: Antonio doesn't enjoy destroying upgrade items. Hermanthorn Jr. Kokomo Beach (cmd_fild07): 349,285 No password is needed to enter the building. However, to enter the maze, you will be given the code 3019. 6. As soon as you are inside you will be asked if you are ready to enter to maze. (Tip: Hotkey Backslide, Hide and have Authoritative Badges if you have access to them. A pair of Peco Wings will make this a breeze). You will be able to hide from any monster you encounter in the maze. A good tip would be just stay close to the wall. If you fail the first time, just try it until you get it right. The map below represents the maze that Antonio Jr., Hollgrehenn Jr., and Aragham Jr. will send you to. The tiles marked in blue will summon monsters onto the nearby red tiles when you step on them. (Be careful not to touch them if you retreat, touching them more than once will summon more than one mob) 
You can wear a Frilldora compounded Garment to be able to use Cloaking along walls without worry. The monsters spawning in the maze cannot detect hidden characters so you can finish the test without any trouble. 7. Once you escape from the maze, talk to the Rogue Guildsman (Markie) and who will promote you to Rogue.
| ||||||||||||||||||||||||||||||||||||||||
