Rogue Job Change Guide: Difference between revisions
Superadmin (talk | contribs) Fatesend agent rewrite |
Superadmin (talk | contribs) No edit summary |
||
| Line 3: | Line 3: | ||
| joblevelreq = 40 | | joblevelreq = 40 | ||
| classreq = Thief | | classreq = Thief | ||
| partyreq = | | partyreq = | ||
| itemreq = Varies | | itemreq = Varies (+ 10,000 Zeny) | ||
| nitemreq = | | nitemreq = | ||
| zenyreq = | | zenyreq = 10,000 (for Mr. Smith) | ||
| questsreq = | | questsreq = | ||
| questscoreq = | | questscoreq = | ||
| baseexpreward = | | baseexpreward = | ||
| jobexpreward = | | jobexpreward = | ||
| itemreward = | | itemreward = | ||
* {{item |id=1220 Gladius <nowiki>[3]</nowiki>}} (Job Lv 50) OR {{item |id=1219 Gladius <nowiki>[2]</nowiki>}} (Job Lv 40-49) | |||
* {{item |id=1097 Worn Out Page}} (only in the rare "pissed off" item request) | |||
| qreward = Jobchange to [[Rogue]] | | qreward = Jobchange to [[Rogue]] | ||
}} | }} | ||
1. Go to the {{map |id=cmd_fild07 Pharos Lighthouse}} (cmd_fild07). | 1. Go to the {{map |id=cmd_fild07 Pharos Lighthouse}} (cmd_fild07). You can reach it from [[Comodo]] or [[Morroc]] via [[Kafra]] warp. | ||
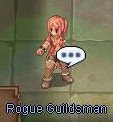
2. | 2. Enter the lighthouse and take the portal at (cmd_fild07 193,117) to reach the Rogue Guild. Talk to the '''Rogue Guildsman''' in {{map|id=in_rogue Rogue Guild}} (in_rogue 363,122). | ||
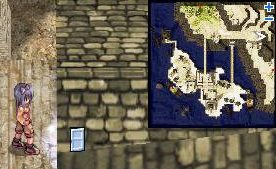
[[Image:Rogue_Guildsman.jpg]] | [[Image:Rogue_Guildsman.jpg]] | ||
3. | 3. '''Important''' | ||
* You must be a '''Thief Job Level 40+'''. | |||
* You must have '''0 unspent skill points'''. | |||
4. The Rogue Guildsman will ask you one of the following question sets (answers in '''bold'''). You need '''at least 9/10 correct'''. | |||
'''Set 1''' | '''Set 1''' | ||
| Line 36: | Line 42: | ||
'''Set 2''' | '''Set 2''' | ||
# ''By what percentage is the flee rate increased when a Thief masters | # ''By what percentage is the flee rate increased when a Thief masters Improve Dodge?'' '''30''' | ||
# ''Choose the monster that detects | # ''Choose the monster that detects characters using Hiding or Cloaking.'' '''Argos''' | ||
# ''Choose the location where Thieves can change their jobs to Rogues.'' '''Paros Lighthouse''' | # ''Choose the location where Thieves can change their jobs to Rogues.'' '''Paros Lighthouse''' | ||
# ''In which town can | # ''In which town can Novices change their Jobs to Thieves?'' '''Morroc''' | ||
# ''Choose the card that does not affect the DEX stat.'' '''Mummy Card''' | # ''Choose the card that does not affect the DEX stat.'' '''Mummy Card''' | ||
# ''So what's cool about being a Rogue?'' ''' | # ''So what's cool about being a Rogue?'' '''Any answer''' | ||
# ''When is it possible to change from Thief to Rogue?'' '''At Job Level 40''' or '''At Job Level 50''' | # ''When is it possible to change from Thief to Rogue?'' '''At Job Level 40''' or '''At Job Level 50''' | ||
# ''You want to dye your hair blue. What town do you go to, and in which | # ''You want to dye your hair blue. What town do you go to, and in which direction, with 12 o'clock being North.'' '''Prontera, 7 o'clock''' | ||
# ''Choose the mushroom that is required on the Thief job change quest.'' '''Orange Gooey Mushroom''' or '''Orange Net Mushroom''' | # ''Choose the mushroom that is required on the Thief job change quest.'' '''Orange Gooey Mushroom''' or '''Orange Net Mushroom''' | ||
# ''Choose the card that least benefits the Rogue class.'' '''Elder Willow Card''' | # ''Choose the card that least benefits the Rogue class.'' '''Elder Willow Card''' | ||
| Line 49: | Line 55: | ||
'''Set 3''' | '''Set 3''' | ||
# ''Choose the skill necessary for learning Stalk.'' '''Hiding''' | # ''Choose the skill necessary for learning Stalk.'' '''Hiding''' | ||
# ''In comparison to | # ''In comparison to Merchant Discount Lv10, how much more % discount does Rogue Haggle Lv10 give?'' '''1 %''' | ||
# ''What is the correct description for | # ''What is the correct description for Mug?'' '''Steal Zeny from monsters''' | ||
# ''How many Rogues | # ''How many Rogues are required to activate Slyness?'' '''2 Rogues''' | ||
# ''Choose the skill that you can learn at Level 5 Divest Helm.'' '''Divest Shield''' | # ''Choose the skill that you can learn at Level 5 Divest Helm.'' '''Divest Shield''' | ||
# ''Choose the skill which allows its user to move while hiding.'' '''Stalk''' | # ''Choose the skill which allows its user to move while hiding.'' '''Stalk''' | ||
# ''Choose the card that increases the accuracy rate of its owner.'' '''Mummy Card | # ''Choose the card that increases the accuracy rate of its owner.'' '''Mummy Card''' | ||
# ''Choose the monster that receives more damage | # ''Choose the monster that receives more damage when attacked by a weapon with a Vadon card.'' '''Elder Willow''' | ||
# ''How much SP does | # ''How much SP does Double Attack require when used with a Dagger?'' '''Passive skill, no SP required''' | ||
# ''Choose the most efficient dagger to use in the Byalan Dungeon.'' '''Wind Main-Gauche''' | # ''Choose the most efficient dagger to use in the Byalan Dungeon.'' '''Wind Main-Gauche''' | ||
5. Once you have passed the written test, you will be sent to '''Mr. Smith''' (in_rogue 376,23). He will require an '''application fee''' and '''one random item set'''. | |||
[[Image:Rogue_Mr._Smith.jpg]] | [[Image:Rogue_Mr._Smith.jpg]] | ||
| Line 65: | Line 71: | ||
{| class="wikitablec" | {| class="wikitablec" | ||
|- | |- | ||
! Set !! | ! Item Set !! Requirements | ||
|- | |- | ||
| Set | | Set A || | ||
10,000 [[Zeny]], | |||
10 {{item |id=932 Skel-Bone}}, | |||
6 {{item |id=510 Blue Herb}}, | |||
10 {{item |id=957 Decayed Nail}}, | |||
10 {{item |id=958 Horrendous Mouth}} | |||
|- | |- | ||
| Set | | Set B || | ||
10,000 [[Zeny]], | |||
10 {{item |id=511 Green Herb}}, | |||
10 {{item |id=964 Crab Shell}}, | |||
10 {{item |id=926 Snake Scale}}, | |||
10 {{item |id=910 Garlet}} | |||
|- | |- | ||
| Set | | Set C || | ||
10,000 [[Zeny]], | |||
10 {{item |id=508 Yellow Herb}}, | |||
10 {{item |id=935 Shell}}, | |||
10 {{item |id=940 Grasshopper's Leg}}, | |||
10 {{item |id=948 Bear's Footskin}} | |||
|- | |- | ||
| | | ''Rare (pissed off request)'' || | ||
10,000 [[Zeny]], | |||
5 {{item |id=915 Chrysalis}}, | |||
5 {{item |id=703 Empty Bottle}}, | |||
5 {{item |id=1002 Iron Ore}}, | |||
5 {{item |id=953 Stone Heart}}, | |||
5 {{item |id=507 Red Herb}}, | |||
5 {{item |id=919 Animal Skin}}, | |||
5 {{item |id=715 Yellow Gemstone}}, | |||
5 {{item |id=918 Tooth of Bat}}, | |||
5 {{item |id=904 Scorpion Tail}}, | |||
5 {{item |id=942 Yoyo Tail}}, | |||
5 {{item |id=528 Monster Feed}}, | |||
5 {{item |id=914 Fluff}}, | |||
5 {{item |id=705 Clover}}, | |||
5 {{item |id=916 Feather of Birds}}, | |||
5 {{item |id=917 Talon}}, | |||
5 {{item |id=908 Spawn}}, | |||
10 {{item |id=945 Racoon Leaf}} | |||
|} | |} | ||
6. After you pay Mr. Smith: | |||
* If you got Set A/B/C, he will send you to '''one of three partners''' (you must remember the password). | |||
*''' | * If you got the '''rare request''', you will be sent to '''Hermanthorn Jr.''' inside the Rogue Guild. | ||
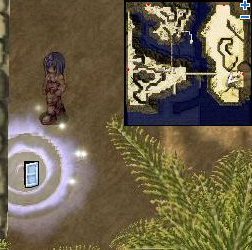
'''Aragham Jr.''' | '''Aragham Jr.''' | ||
| Line 100: | Line 137: | ||
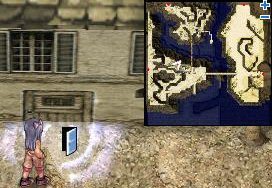
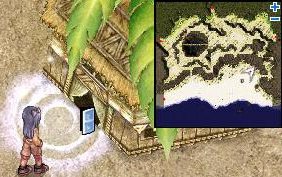
[[Image:Rogue_Antonio_Jr.jpg]] | [[Image:Rogue_Antonio_Jr.jpg]] | ||
{{map |id=cmd_fild04 Kokomo Beach}} (cmd_fild04): | {{map |id=cmd_fild04 Kokomo Beach}} (cmd_fild04): 304,180 | ||
Password: Antonio doesn't enjoy destroying upgrade items. | Password: Antonio doesn't enjoy destroying upgrade items. | ||
'''Hermanthorn Jr.''' | '''Hermanthorn Jr.''' (rare path) | ||
* Location: {{map|id=in_rogue Rogue Guild}} (in_rogue 272,135) | |||
* Tunnel door code: '''3019''' | |||
[[Image:Rogue_Hermanthorn_Jr.jpg]] | [[Image:Rogue_Hermanthorn_Jr.jpg]] | ||
7. '''The Tunnel / Maze''' | |||
You will be warped into the Underground Tunnel instance and must make it back to the Rogue Guild area alive. | |||
Tip: using Hiding helps a lot. Some triggers do not activate if you are hidden. | |||
The map below represents the maze that Antonio Jr., Hollgrehenn Jr., and Aragham Jr. will send you to. The tiles marked in <font color=#0000FF>blue</font> will summon monsters onto the nearby <font color=#FF0000>red</font> tiles when you step on them. | |||
The map below represents the maze that Antonio Jr., Hollgrehenn Jr., and Aragham Jr. will send you to. The tiles marked in <font color=#0000FF>blue</font> will summon monsters onto the nearby <font color=#FF0000>red</font> tiles when you step on them. | |||
[[Image:Rogue Maze.png|200px|center|thumb|Click Image to Enlarge]] | [[Image:Rogue Maze.png|200px|center|thumb|Click Image to Enlarge]] | ||
TIP: | TIP: | ||
You can wear a Frilldora compounded garment to use Cloaking along walls more safely. | |||
The monsters spawning in the maze cannot detect hidden characters, so you can finish the test without much trouble. | |||
8. Once you escape from the maze, return to the '''Rogue Guildsman''' (in_rogue 363,122) and he will change your job to '''Rogue'''. | |||
* Job Lv 50: {{item |id=1220 Gladius <nowiki>[3]</nowiki>}} | |||
* Job Lv 40-49: {{item |id=1219 Gladius <nowiki>[2]</nowiki>}} | |||
* | |||
{{Navbox Rogue}} | {{Navbox Rogue}} | ||
Revision as of 20:02, 7 February 2026
1. Go to the Pharos Lighthouse (cmd_fild07). You can reach it from Comodo or Morroc via Kafra warp. 2. Enter the lighthouse and take the portal at (cmd_fild07 193,117) to reach the Rogue Guild. Talk to the Rogue Guildsman in Rogue Guild (in_rogue 363,122). 3. Important
4. The Rogue Guildsman will ask you one of the following question sets (answers in bold). You need at least 9/10 correct. Set 1
Set 2
Set 3
5. Once you have passed the written test, you will be sent to Mr. Smith (in_rogue 376,23). He will require an application fee and one random item set.
6. After you pay Mr. Smith:
Aragham Jr. Fortress Saint Darmain (South) (cmd_fild09): 106, 195 Password: Aragham never hoarded upgrade items. Hollgrehenn Jr. Fortress Saint Darmain (South) (cmd_fild09): 335, 143 Password: My father never hoarded upgrade items. Antonio Jr. Kokomo Beach (cmd_fild04): 304,180 Password: Antonio doesn't enjoy destroying upgrade items. Hermanthorn Jr. (rare path)
7. The Tunnel / Maze You will be warped into the Underground Tunnel instance and must make it back to the Rogue Guild area alive. Tip: using Hiding helps a lot. Some triggers do not activate if you are hidden. The map below represents the maze that Antonio Jr., Hollgrehenn Jr., and Aragham Jr. will send you to. The tiles marked in blue will summon monsters onto the nearby red tiles when you step on them.  TIP: You can wear a Frilldora compounded garment to use Cloaking along walls more safely. The monsters spawning in the maze cannot detect hidden characters, so you can finish the test without much trouble. 8. Once you escape from the maze, return to the Rogue Guildsman (in_rogue 363,122) and he will change your job to Rogue.
| ||||||||||||||||||||||||||||||||||||||||
